
Led Blink with Explore M3
Blinking an LED is fun for a newbie, a setup test for a Embedded Developer and for this tutorial it getting started with Explore M3 and answering some basic questions like, where did it come from? which are usually ignored if it is programming just with Arduino.

The Example
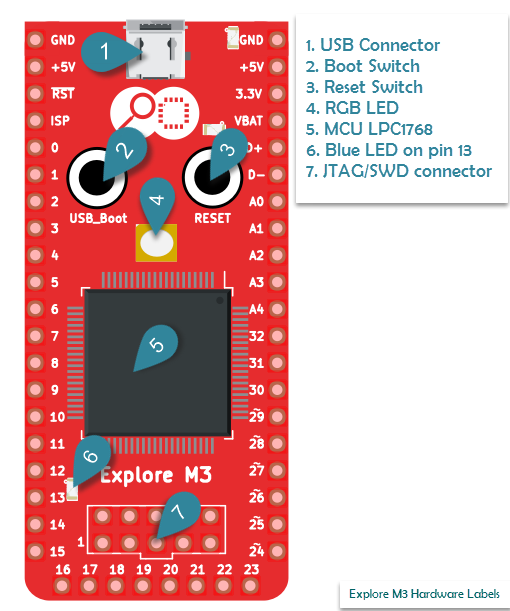
I would recommend you to go through the board introduction and setup tutorial before proceeding with this one. Explore M3 has an on board blue led connected to pin 13. It is indicated by 6 in figure.So there is no physical hookup required for tutorial.

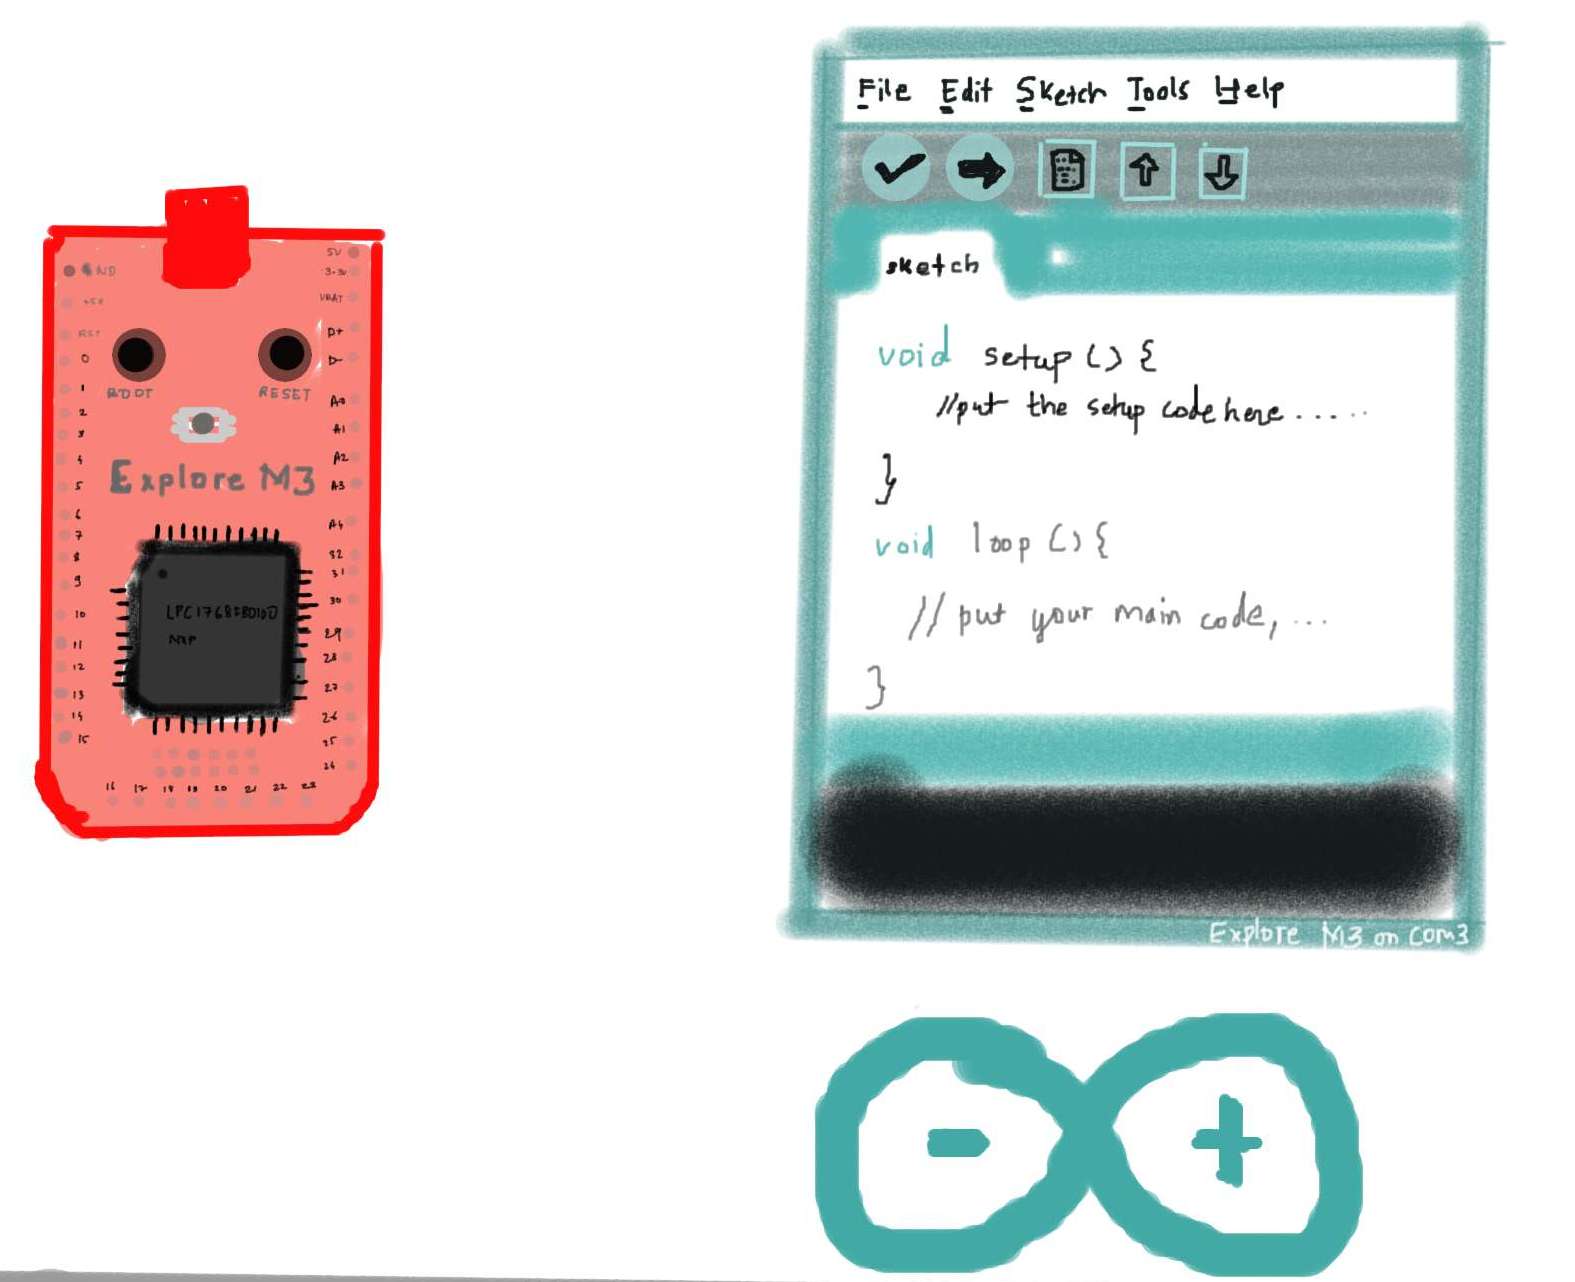
Even the code, as you might now is there in the IDE. You may select as shown below:

The code in all its glory!
- // the setup function runs once when you press reset or power the board
- void setup() {
- // initialize digital pin 13 as an output.
- pinMode(13, OUTPUT);
- }
- // the loop function runs over and over again forever
- void loop() {
- digitalWrite(13, HIGH); // turn the LED on (HIGH is the voltage level)
- delay(100); // wait for a second
- digitalWrite(13, LOW); // turn the LED off by making the voltage LOW
- delay(100); // wait for a second
- }
A few questions
Now that we are happy with the blinky, here are some questions! You may skip them if they do not serve your purpose. However if you want to take it beyond, here we go!
- If Arduino programming is indeed C++, why don't I see any header files? Where did the setup() and loop() function come from?
- Well, the answer is they are still there but they are hidden. The extension the program/sketch file is .ino but there is an accompanying C++ file that has all the header files and other dependencies. The next obvious question is where is that file? But wait, you don't really need to know in which temp folder that exists; what I think you need to know is how can I get away with this. The answer is try the blinky on bare metal with this tutorial. This tutorial may not directly answer the question, but will set you up in the right direction.
- What compiler does this thing use?
- It's the open source ARM GCC, check this tutorial on how to set this up and use it directly.
- How is the program uploaded to the board?
- Explore M3 uses a utility called DFU-Util, other arduino boards might use some thing else. As with ARM GCC, you may as well set this thing independently.
I hope you've enjoyed this curious blinky ride, I know there may be a lot of relevant questions popping up. So go ahead and explore, and comment below any question or comment, little or big, complex or silly!
Video Tutorial
Explore M3 Introduction
Explore M3 is a feature rich ARM Cortex M3 development board. It can help you prototype ideas faster with Arduino/mbed and take them be beyond with bare metal programming, RTOS support and lower power...
Arduino Setup for Explore M3
In this tutorial we will look at the basic setups of setting up the ExploreM3 on Arduino and installing DFU and Vcom drivers on Windows, Linux and MAC. Finally we will flash a simple led-blink example...
Led Blink with Explore M3
Blinking an LED is fun for a newbie, a setup test for a Embedded Developer and for this tutorial it getting started with Explore M3 and answering some basic questions like, where did it come from...
Explore M3 Arduino Libraries
Arduino libraries need no introduction. There are numerous devices and peripherals that work with Arduino. This page lists all the libraries that have been tested or ported to Explore M3. ...