
Liquid Crystal Displays with Explore M3
Character Liquid crystal displays are very handy and extremely simple to use. In this tutorial let us hook up 16x1, 16x2, 20x4 displays and test them with Explore M3. We will be using the LiquidCrystal Arduino library to accomplish this.
Contents
[hide]Hook up
There are various modes in which these displays can be connected to Explore M3 as shown below. It is combination of using 8 bit or 4 bits as database and using or not using the RW line on the display.
- LiquidCrystal(rs, enable, d4, d5, d6, d7)
- LiquidCrystal(rs, rw, enable, d4, d5, d6, d7)
- LiquidCrystal(rs, enable, d0, d1, d2, d3, d4, d5, d6, d7)
- LiquidCrystal(rs, rw, enable, d0, d1, d2, d3, d4, d5, d6, d7)
So lets use the first mode which needs the least of the pins. The potentiometer is used to set the display contrast and resistor limits current to the LCD back-light.

Code
- // include the library code:
- #include <LiquidCrystal.h>
- // initialize the library with the numbers of the interface pins
- LiquidCrystal lcd(12, 11, 5, 4, 3, 2);
- void setup() {
- // set up the LCD's number of rows and columns:
- lcd.begin(16, 2);
- // Print a message to the LCD.
- lcd.print("hello, world!");
- }
- void loop() {
- // set the cursor to column 0, line 1
- // (note: line 1 is the second row, since counting begins with 0):
- lcd.setCursor(0, 1);
- // print the number of seconds since reset:
- lcd.print(millis()/1000);
- }
20 x 4 Character LCD
- //Demonstrates use of 20x4 character display on Explore M3
- #include <LiquidCrystal.h>
- LiquidCrystal lcd(12, 11, 5, 4, 3, 2);
- void setup() {
- lcd.begin(20,4); // 20 Characters on 4 lines
- }
- void loop() {
- lcd.setCursor(0, 0);
- lcd.print("Explore M3");
- lcd.setCursor(0, 1);
- lcd.print("Character LCD");
- lcd.setCursor(0, 2);
- lcd.print("4 lines");
- lcd.setCursor(0, 3);
- lcd.print("20 Characters ;)");
- }
Demo
The same hookup can be used to interface 16x1, 16x4 and 20x4 displays. The only things that will change is
- lcd.begin(16, 2); //for 16x2 display
- lcd.begin(16, 1); //for 16x1 display
- lcd.begin(20, 4); //for 20x4 display
- lcd.setCursor(0, 1); //can be used to set the cursor, according to the display size.
16 x 2 Display

20 x 4 Display

References
Going further you may want to explore bare metal way to interface displays with Explore M3. Mind you, that will be more in-depth stuff in terms display as well as the controller.
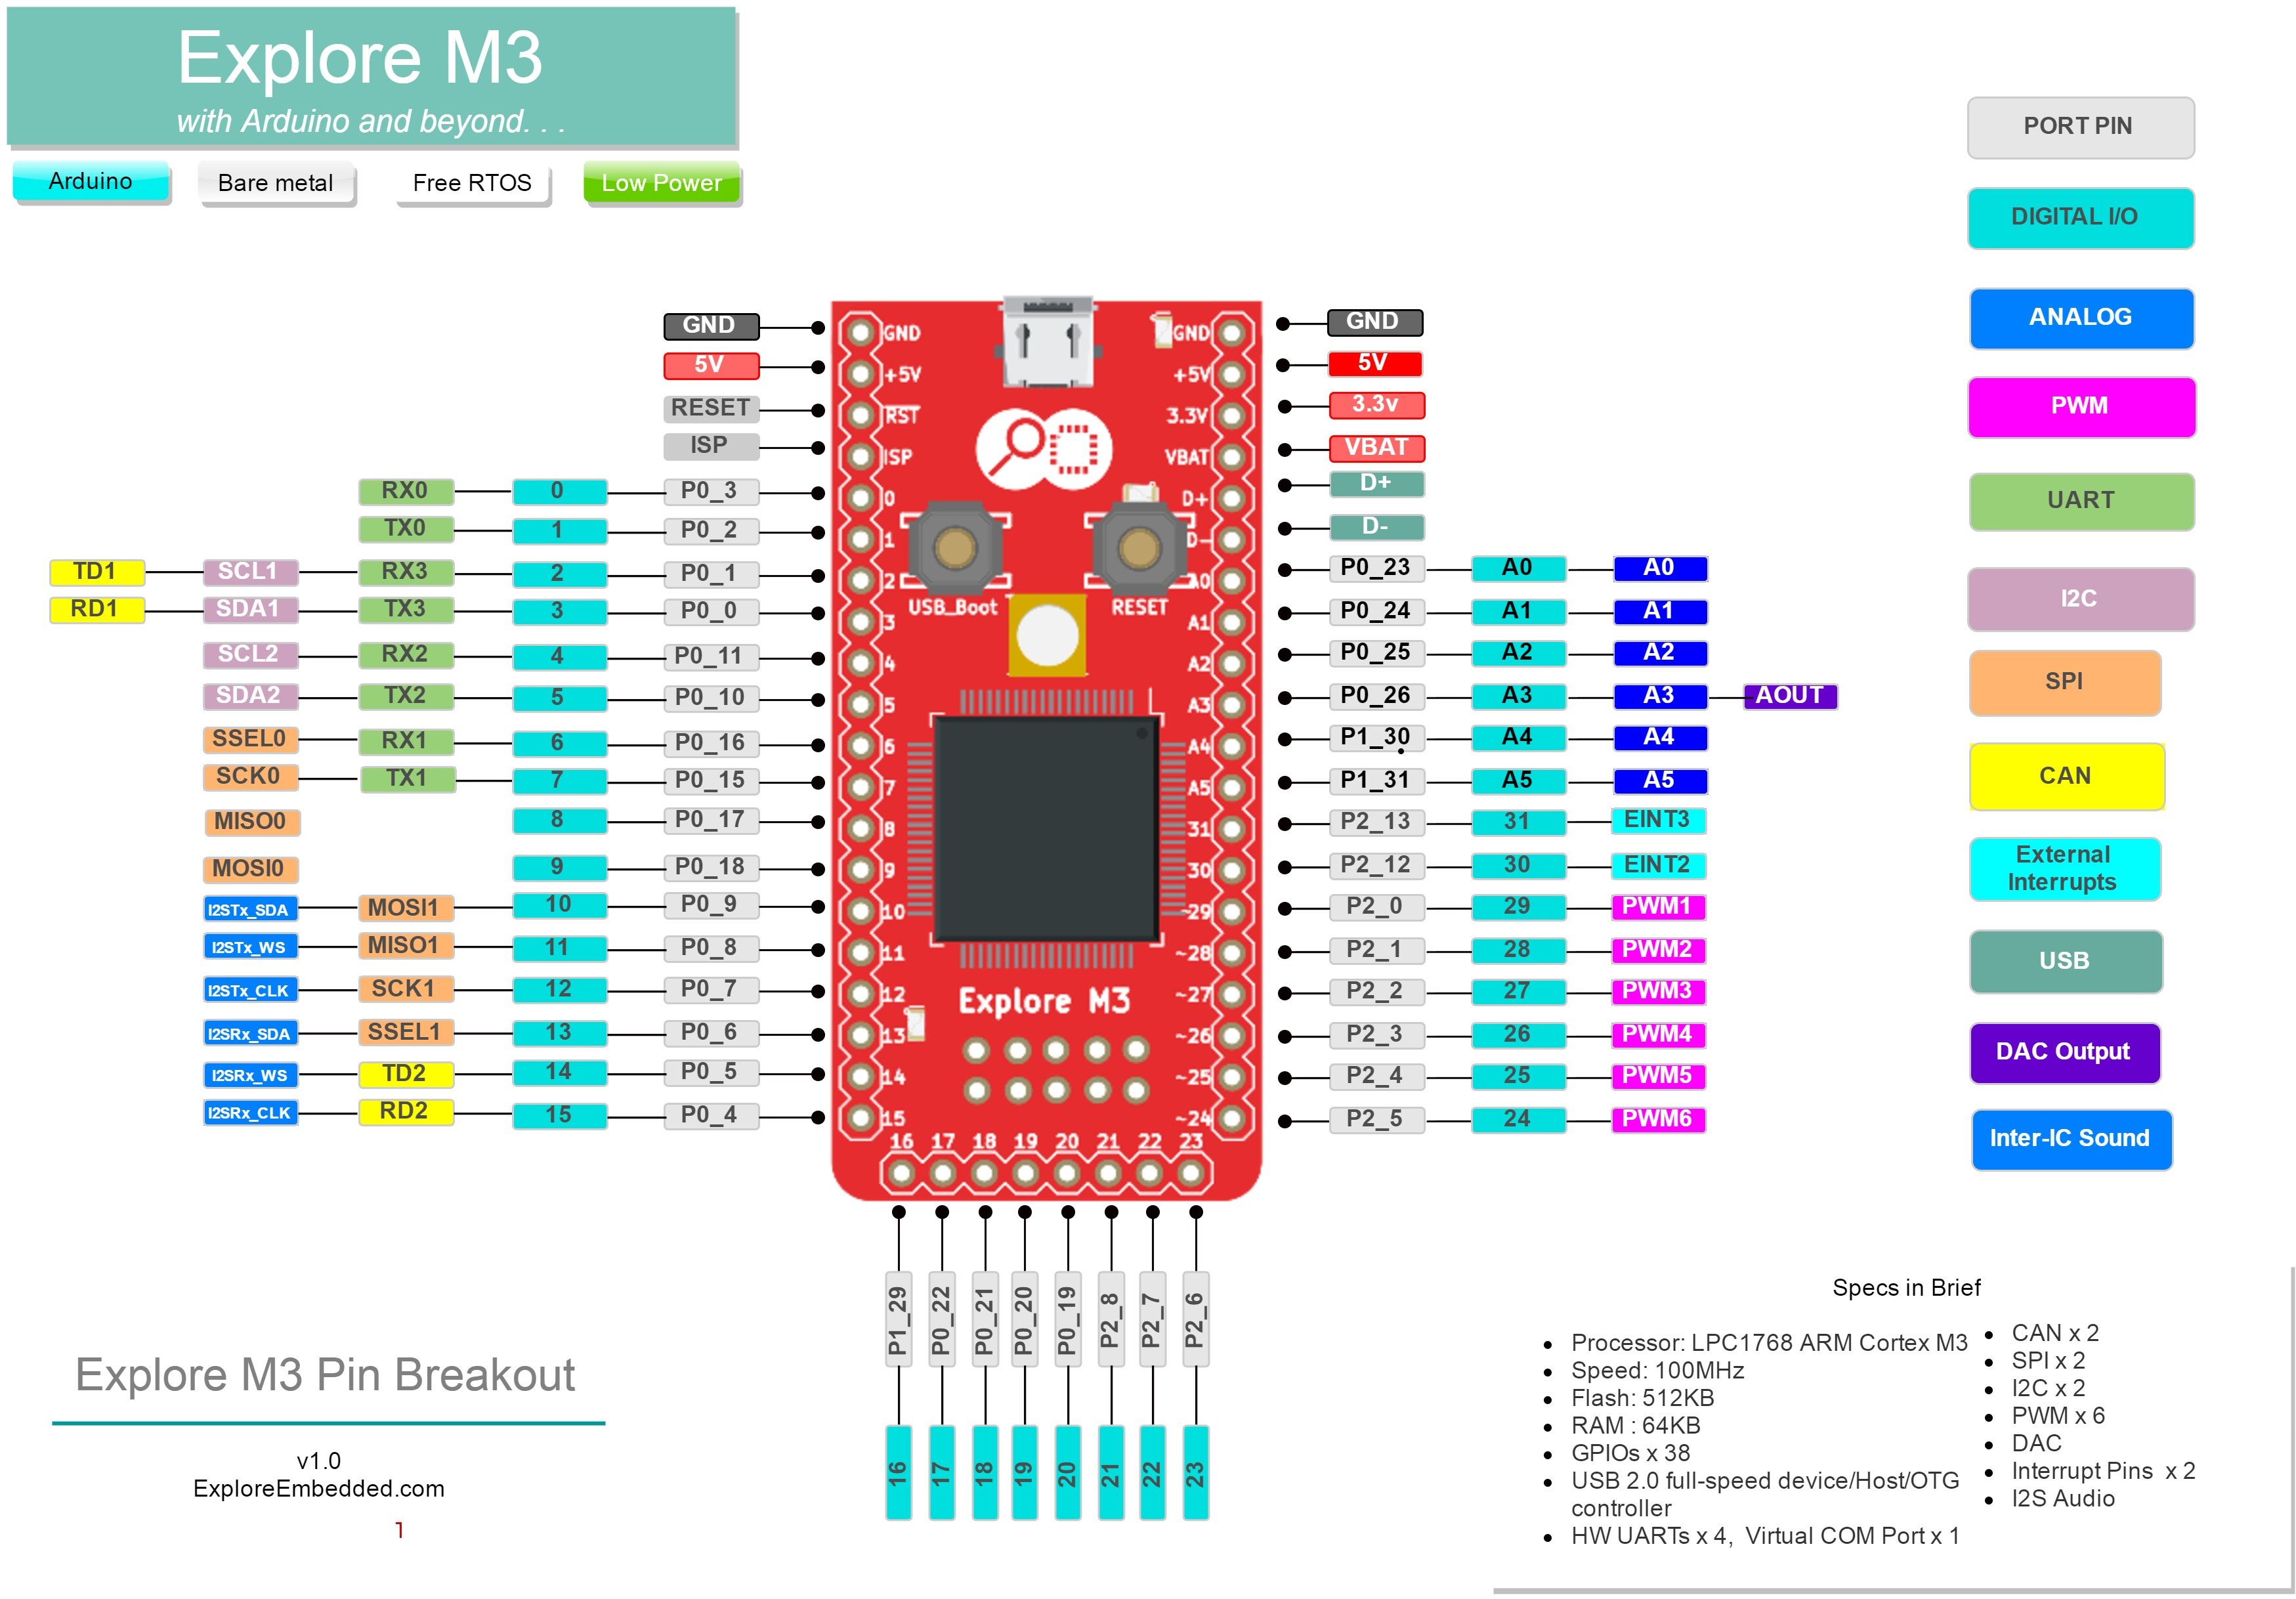
Explore M3 Introduction
Explore M3 is a feature rich ARM Cortex M3 development board. It can help you prototype ideas faster with Arduino/mbed and take them be beyond with bare metal programming, RTOS support and lower power...
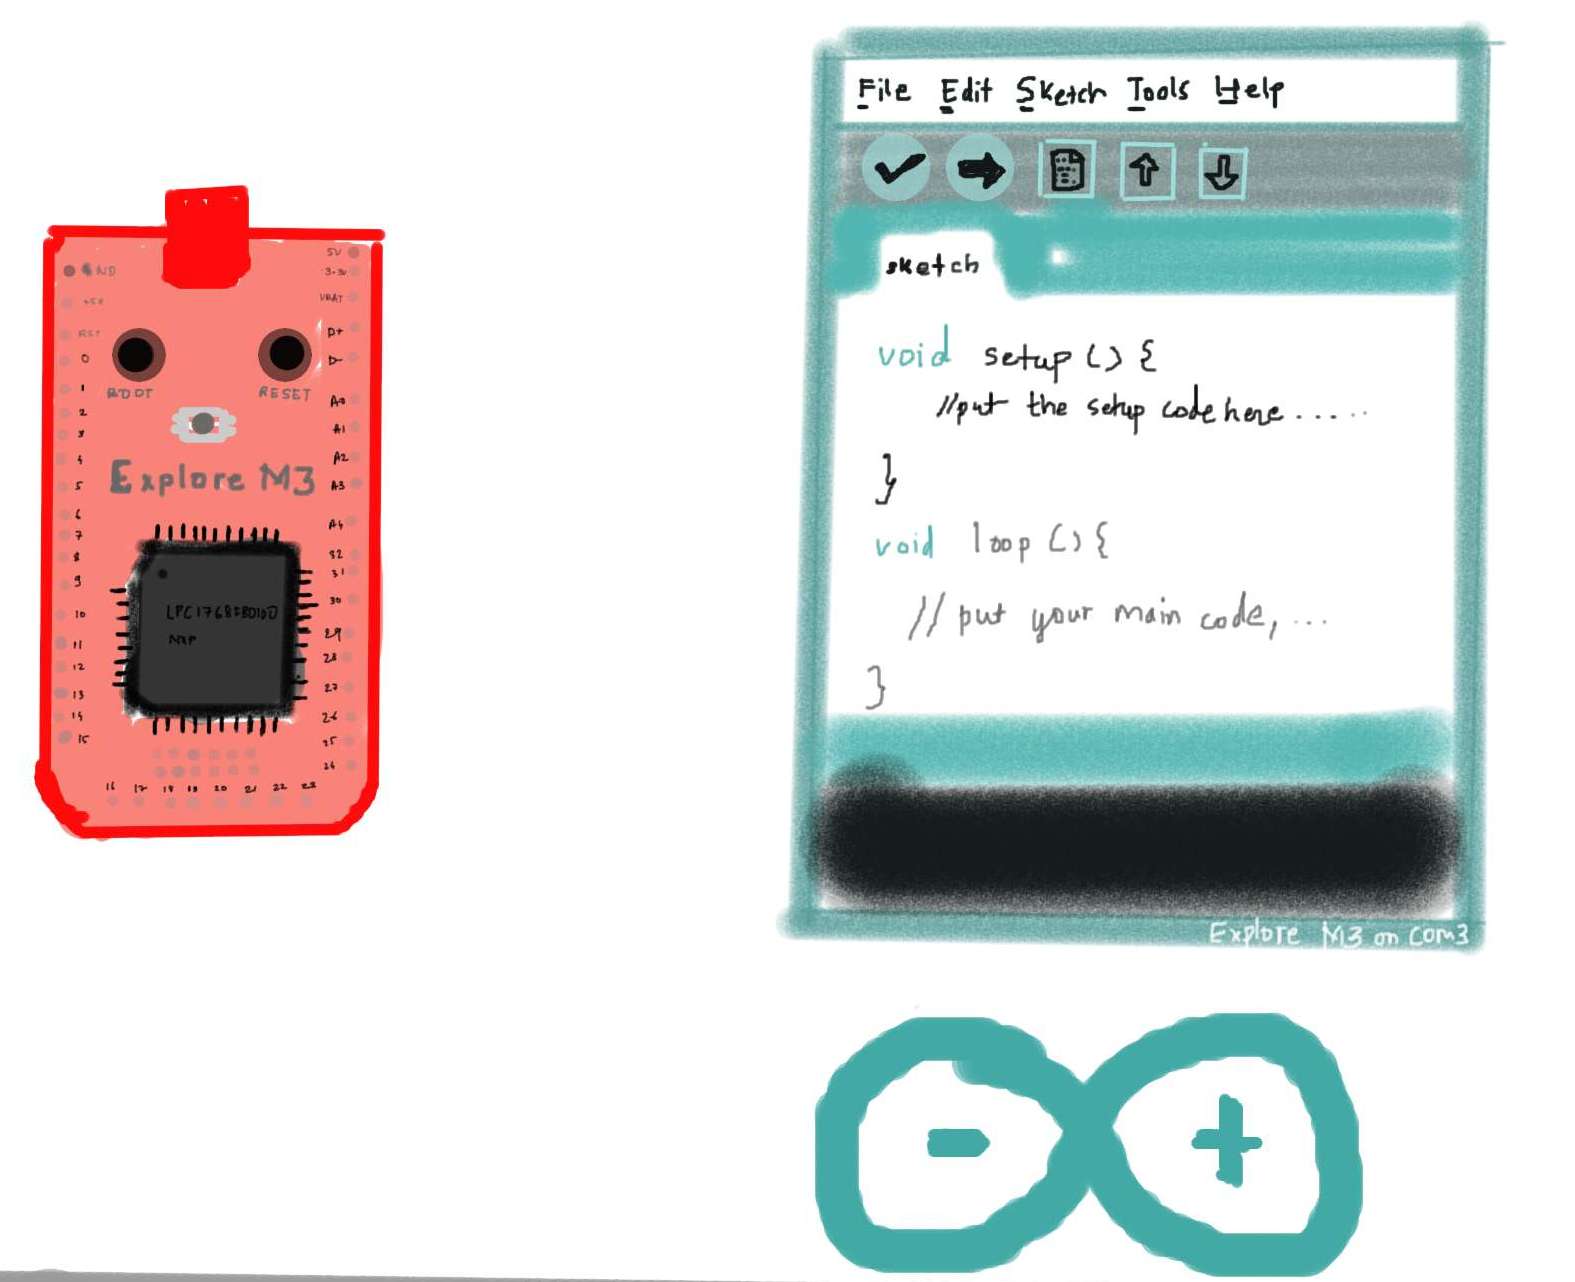
Arduino Setup for Explore M3
In this tutorial we will look at the basic setups of setting up the ExploreM3 on Arduino and installing DFU and Vcom drivers on Windows, Linux and MAC. Finally we will flash a simple led-blink example...
Led Blink with Explore M3
Blinking an LED is fun for a newbie, a setup test for a Embedded Developer and for this tutorial it getting started with Explore M3 and answering some basic questions like, where did it come from...
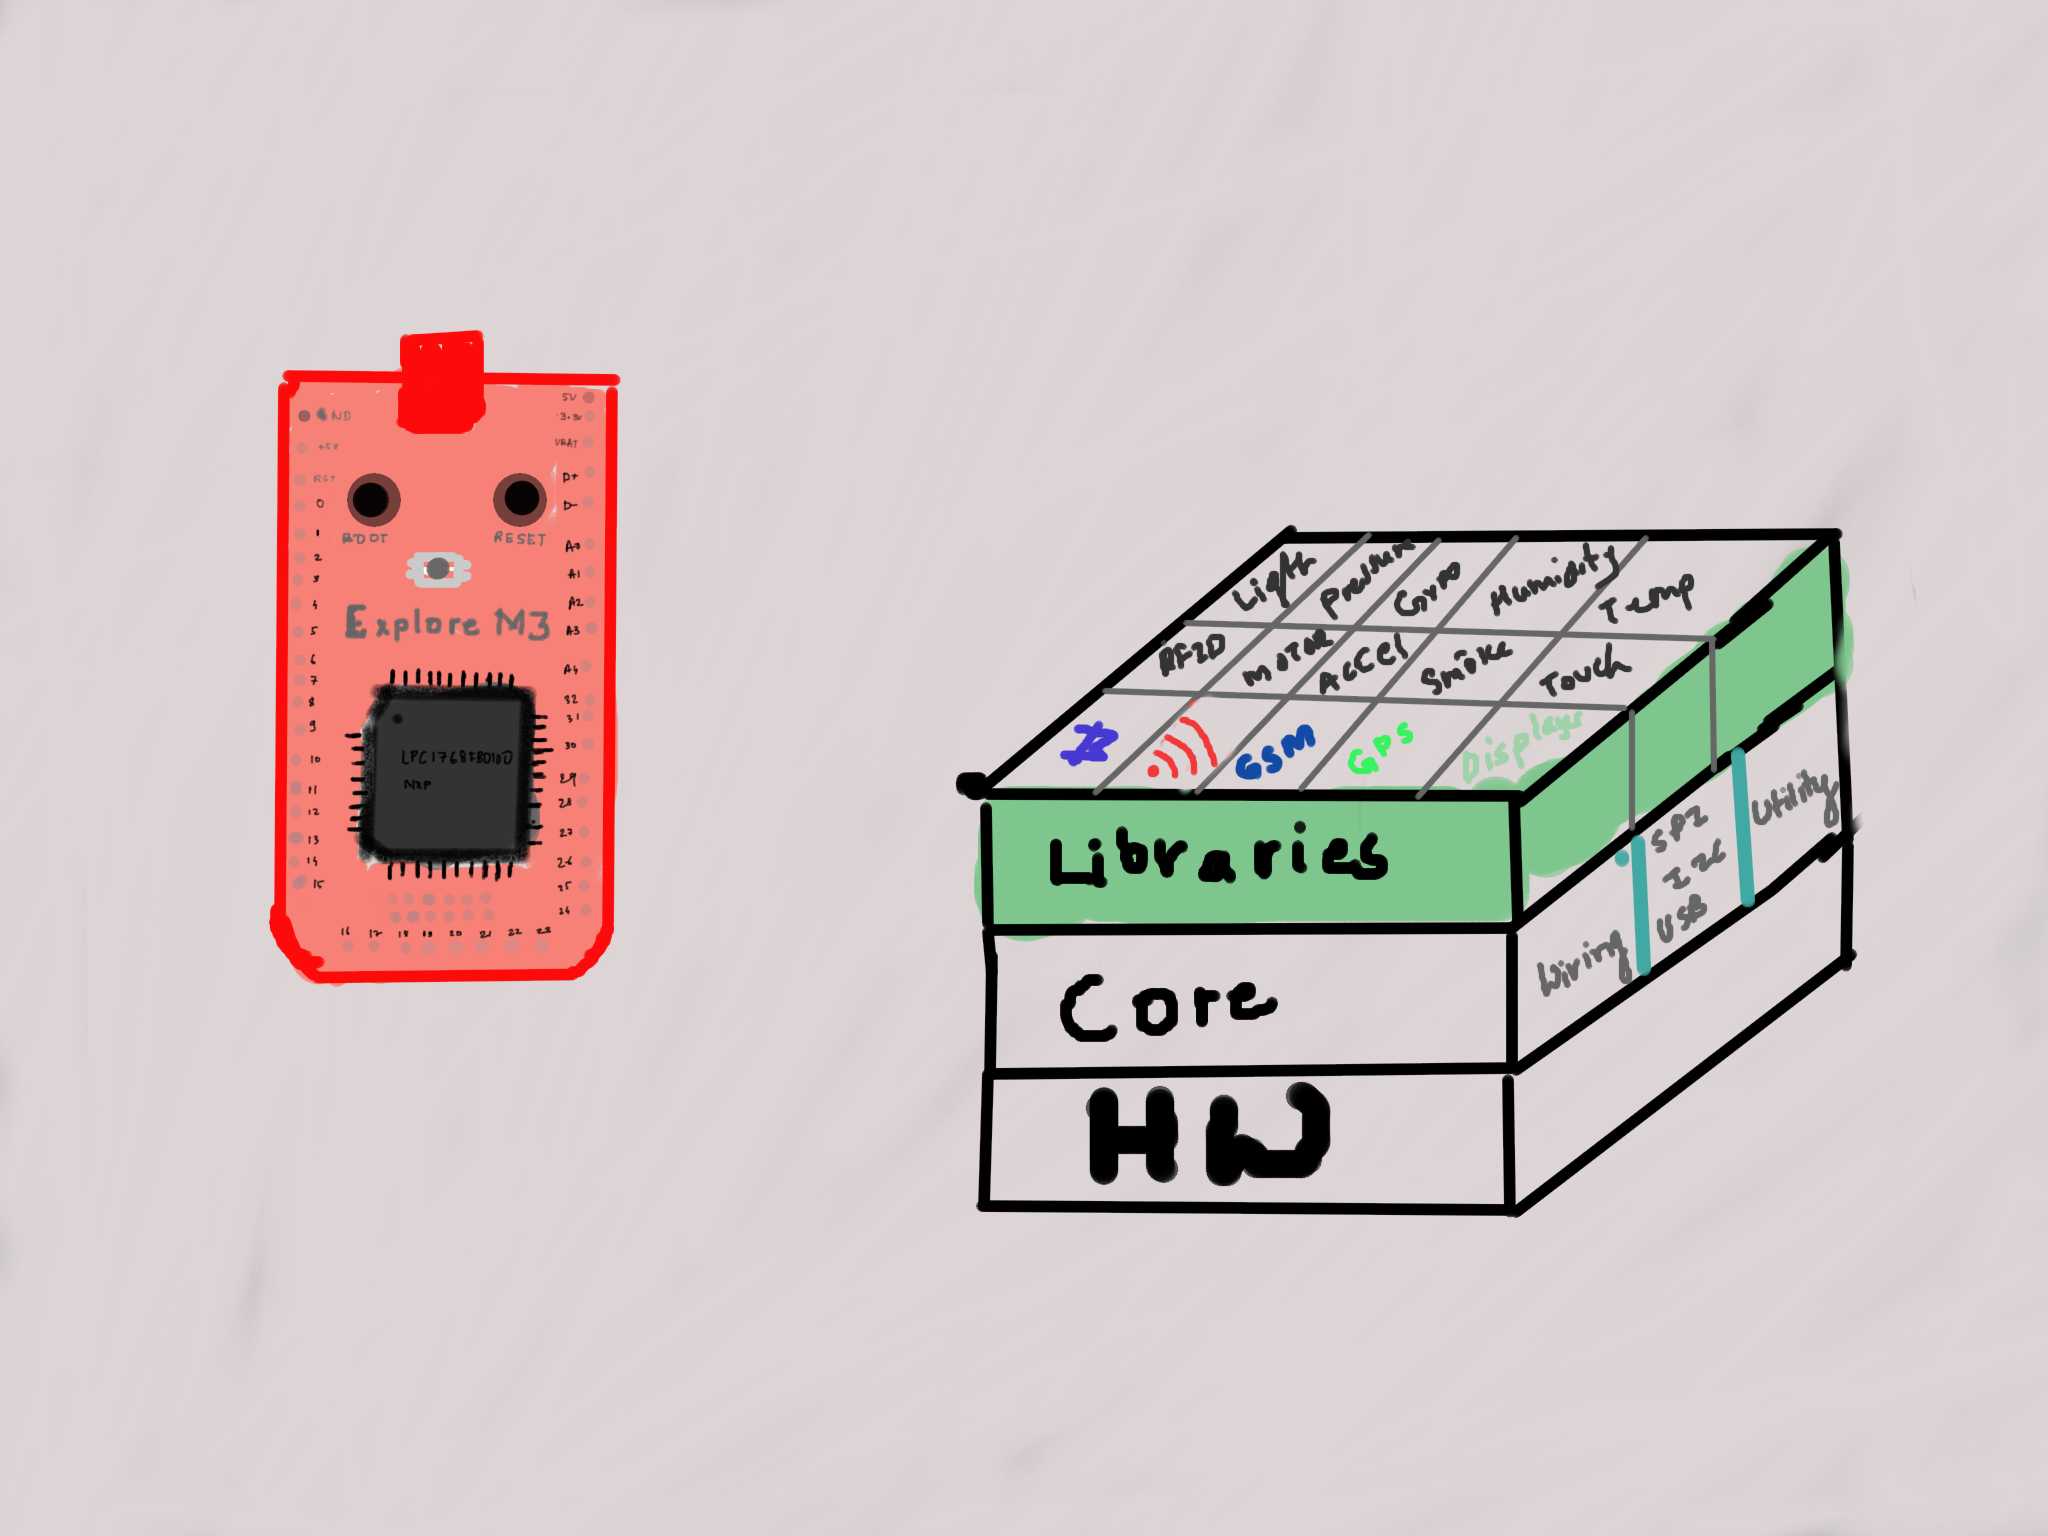
Explore M3 Arduino Libraries
Arduino libraries need no introduction. There are numerous devices and peripherals that work with Arduino. This page lists all the libraries that have been tested or ported to Explore M3. ...